Monday 14 October 2013

Digital Solarisation

In this post I will be discussing digital solaristion and demonstrating how to achieve this in photoshop.

Solarisation is when an images tones are reversed partially or wholly. So simply put, dark turns to light, light turns to dark.

I will be experiement digitally today in photoshop and with the help of photo tutplus I will be providing you with a step by step demonstrations on how to acheive this effect.

Step One:
Open image and convert into black and white

Layer > Adjustment layer > Black and White


Step Two: 

Curves: The curves adjustment layer is probably the most important tool and the only tool we really need to use for this technique.
Adjustment Panel Tools Palette or go Layer > New adjustment Layer > Curves


Step Three:

With the curve adjustment open you need to draw and inverted V.

Start at the bottom left, click once at output 0, input 0. Then hold down shift and then click again in the center at the top. (output 255, input 127).


Step Four:

Create another curves layer and make some final tweaks:


http://photo.tutsplus.com/tutorials/post-processing/quick-tip-using-adobe-photoshop-to-create-a-solarised-photograph/

David Hockney joiner experiment

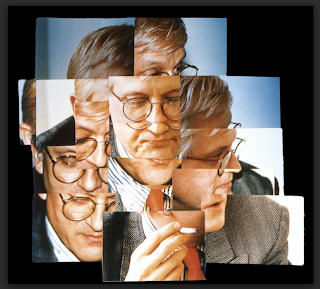
In this post I will be demonstrating how to create a David Hockney styled joiner image.

David Hockney is an English photographer amongst many other things such as a painter. He is based in Bridlington, Yorkshire, and  London. Hockney also spends some time in LA.

                      .

In the early 1980s, Hockney started to produce photocollages, which he called "joiners," starting off with polaroid prints and later of 35mm, processed color prints. Using a large number of Polaroid prints or photolab-prints of a single subject Hockney arranged a patchwork to make a composite image. One of his first photomontages was of his mother. the images are taken from different perspectives and with slightly different lighting resulting in an effect similar to Cubism.

(http://www.shootingfilm.net/2013/01/joiners-polaroid-collages-by-david.html)

Step One: First open your images in Adobe bridge: Select all and batch rename. I chose joiner 001 and so on..


Step Two: Tools > Photoshop > Photomerge, This will then merge all selected images together for you (automated lazy way) 


You can manually adjust by selecting the interactive layout instead of auto layout. For the below example I chose automate:


Im not a great fan of this method, photoshop tends to struggle picking up the lines of a portrait. 
I will be taking more photographs to allow me to merge images together on a blank canvas.
I will update this post with this method soon...


I have found a website that generates Hockney style images from an image of your own. Younsimply upload and image, ensuring it is of hig res, around the 300dpi and click hockneyise. Give it a try, it's great fun!

http://bighugelabs.com/hockney.php


Mirror image portrait

I will be demonstrating in this post how to create a mirrored portrait in photoshop:

Step One: First open image you wish to duplicate. You then need to extend the canvas to have enough room to duplicate. I am mirroring a portait image horizonally rather than vertically so I extended my canvas to the left by 50% 
Image > Canvas size > chanhe pixels to cm and double widthand adjust the direction canvas extender to direct which area you want to extend.


Step Two: First duplicate layer by command j and then Edit > Transform > Flip horizontally


Step Three: Select the eraser tool and a large soft brush and erase the extended canvas on the right to reveal the original extended image underneath.


 Step Four: To blend the backgrounds to create a more even flat colour you can add a fill layer with a darken colour blend mode. If you select the colour of the original background it will even out the colour.
Layer > New Fill Layer > Solid colour > Select background colour with pippet > OK > select fill layer > select Darken colour blend mode

Flatten image and voila!


Portrait in the style of Nadav Kander, colorisation


I had a play around in photoshop today, below I have added a step by step guide on how to achieve these effects

the first is a replica of an image created by a Nadav Kander who created the below image of Gary Barlow


Step One: First open in photoshop a head and shoulder portrait. Convert to black and white and then duplicate the layer (cmd + j)


Srep Two: With the move tool selected drag the top layer slightly to the right giving the image a blurred movement effect. add a layer mask and select brish reducing the opacity to around 30%, remove the blurred effect around the features such as the eyes nose and mouth to your liking.


Step Three: Now select the gradient tool (g) and click and ok the gradient style you wish to add.


Step Four: With the gradient layer selected adjust the blend mode to something suitable, here i chose the overlay blend mode, I then reduced the opacity of this gradient overlay layer to suit.


Step Four alternative: Another way of adding a gradient layer is to go to layer >New adjustment layer >Gradient Map. Select your gradient and again choose your blend mode. 


Step Five: I merged all layers including the two methods of gradient layers to produce the below image. 


Tuesday 1 October 2013

How to create a HDR image with the bracketing method

Today I will be showing you how to create a high dynamic ranged image with the more traditional digital method of bracketing.

In the previous post here, I discussed how this can be achieved with a single RAW image too but today we will be sticking to the more traditional method.

Open up Adobe Photoshop, I will be using cs6 version for my tutorial.

The below images were taken in RAW mode with my canon 5d mark ii, bracketed by two stops and shot in Manual mode, I also used a tripod to stop ghosting (see below)
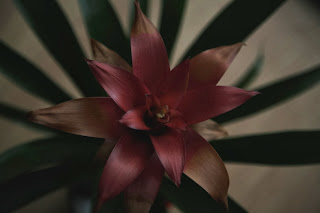
EV -2
EV 0
EV +2
Now to merge above three picture do the follow the following procedure.

Step one:

Open Adobe Photoshop version CS6.
Click on file -> Automate -> Merge to HDR Pro
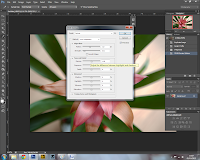
See the following screenshot if you unable to find these menus.

Step Two:

A new window will open from where you can select files to merge.
Its recommended to take 5-7 picture with different exposure to get fine results, but  here I am taking just 3 pictures for the sake of tutorial.
Now select the images, you also remove the images after selecting, see the following screenshot to understand this situation.
Also check the ” Attempt to automatically align source images”.

Step Three:

Your images will now be merged into a single photo. You can turn off individual photos by un checking their boxes on the left filmstrip. If you get some blurring caused by camera shake in the longest exposure, you may want to turn off that photo. If there is ghosting because of movement, click the box: Remove Ghosts.

The merged result is a floating-point 32 bit image. Change the mode to 32 bit. You can view the available tones by sliding the White Point slider on the right of the screen under the histogram.This slider doesn't change the image, it is there for you to examine the range of tones, because a monitor isnt capable of displaying all the tonal detail in a 32-bit file all at once.


Step Four:

In order to use the photos, you'll need to convert them to 16 or 8 bit images.  While we have this huge dynamic range available in 32 bit, we will no longer have those options after conversion. Always work from the saved 32 bit version, and then convert and save versions (personal interpretations). Avoid overwriting the 32 bit image, it's our master and we may want to go back to it many times.
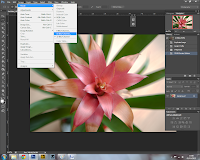
Choose Image>Mode>16 bit (or 8 bit). Now we get to play with some fun options. You're now at the tone mapping part of the process. This is were you get to play!


(If you want to make the adjustments without converting, choose view>32 Bit Preview Options. You can use several of Photoshop's tools in the Image>Adjustments menu. The most important of these is the Exposure control)

You'll see an HDR Toning Dialog box. The majority of the time I set my preset to Photorealistic then selecting Local Adaption in the drop down Method tab I can then make some more minor adjustments to the image:
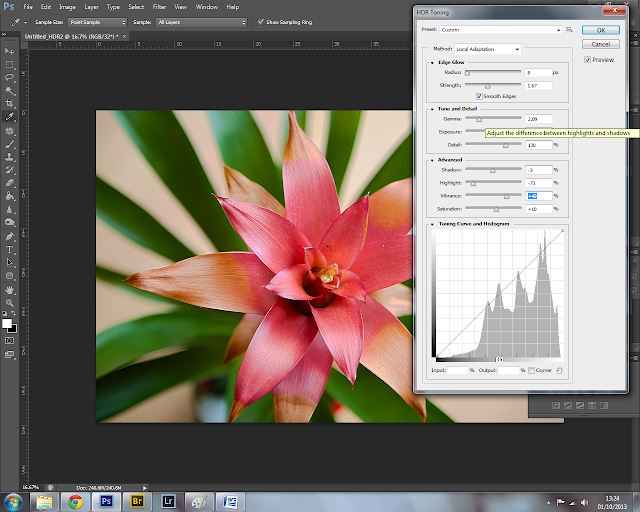
Take a look at my adjustments to the right of the image

Edge Glow
Once your happy with the curve, adjust the radius and strength sliders to make sure there are no halos in the photo. (Badly converted HDR images have a glow around the areas of contrast.) The radius controls the mask blur while the strength decides how strong to apply the effect. I normally tick the Smooth Edges box too to sharpen the edges up.

Tone and Detail
Gamma: This is where you control the contrast. Extremes are washed out or super punchy.
Exposure: Controls the overall brightness.
Detail:This sharpens or softens the appearance.

Advanced
Shadow: Opens up details in darkest parts of the photograph.
Highlight: Recovers detail in the brightest areas of the photograph.
Vibrance: This makes the photo more colorful without over saturating areas that are already colorful. 
Saturation: Increases or decreases the overall amount of color. 
Click ok to convert.

There you have it, the final result:


There are lots of methods to achieve HDR styled imagery, below is another example


HDR and Lightroom and Camera RAW


In order to work with a 32 bit file in Lighroom, you must do the following.

1. Merge to HDR as mentioned earlier in this tutorial.

2. Save as 32 bit file, be careful to save as a TIF, it will only work with a Tiff.

3. Import back into Lightroom, or open in Adobe Camera Raw.

4. Use the adjustments as you would normally, but you will notice a lot more control and larger range of tones than before.