the first is a replica of an image created by a Nadav Kander who created the below image of Gary Barlow
Step One: First open in photoshop a head and shoulder portrait. Convert to black and white and then duplicate the layer (cmd + j)
Srep Two: With the move tool selected drag the top layer slightly to the right giving the image a blurred movement effect. add a layer mask and select brish reducing the opacity to around 30%, remove the blurred effect around the features such as the eyes nose and mouth to your liking.
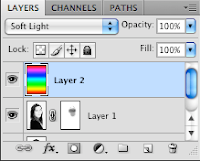
Step Three: Now select the gradient tool (g) and click and ok the gradient style you wish to add.

Step Four: With the gradient layer selected adjust the blend mode to something suitable, here i chose the overlay blend mode, I then reduced the opacity of this gradient overlay layer to suit.
Step Four alternative: Another way of adding a gradient layer is to go to layer >New adjustment layer >Gradient Map. Select your gradient and again choose your blend mode.
Step Five: I merged all layers including the two methods of gradient layers to produce the below image.


No comments:
Post a Comment